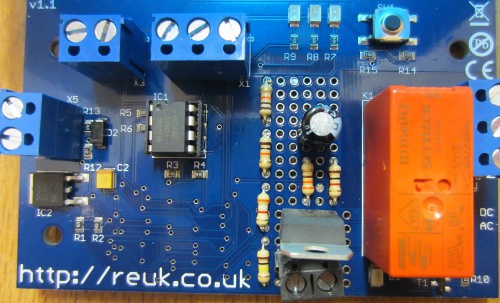
Project of the Day – 12V High Power Regulator with LT1084CP-12

We supply a lot of low dropout 12V regulators – primarily for use with LED lighting when powered from 12V batteries (particularly in vehicles) to get a clean 12.0V output. These regulators are limited to around 0.7 Amps maximum output.
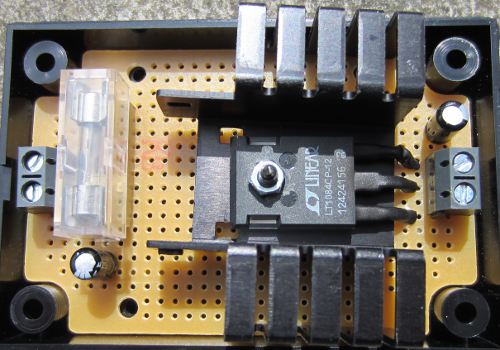
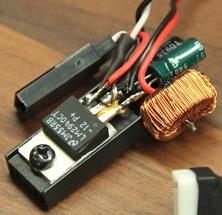
HIgh current 12V regulator based around Linear LT1084CP-12 regulator

The regulator pictured above is a special order 2 Amp rated low dropout regulator for someone who was unable to split a lighting circuit into multiple lower current circuits for regulation with our standard regulators.

It is based around the LT1084CP-12 low dropout regulator from Linear Technology. This IC is rated to supply up to 5 Amps, but it has a higher maximum rated dropout (the voltage difference between target voltage and input voltage below which output voltage falls below target voltage) than the LM2940 chips we use in our regular 12V regulators – 1.5V compared to just 0.5V with the LM2940. (The recommended minimum input voltage for the LT1084CP-12 is 13.5V.)

This higher dropout will not be a problem in this particular application since a) power will be coming from a vehicle battery – therefore maintained constantly at near full charge and voltage, b) only 2 Amps at most will be drawn from the regulator resulting in a dropout of 1V at most, and c) the output is to power LED lighting so if the voltage of the battery were ever to fall to a low charge level, the lighting would just be a a tiny bit dimmer – no harm done.

Click here for the LT1084CP-12 datasheet for more information, or here to purchase this chip: buy LT1084CP-12.
Low Voltage Disconnect with Display and Datalogger

Our user-programmable low voltage disconnect (LVD) circuit remains one of our most popular products – very useful to protect batteries from deep discharge damage.

One request we have received many times is for an LCD (liquid crystal display) to be added to our low voltage disconnect circuits so that the actual voltage of the battery being monitored is shown together with other useful information such as the low voltage disconnect set point, state of the system, and so on.

A second request is for some datalogging of the voltages measured – ideally to be displayed on an LCD. Therefore we have developed a new REUK low voltage disconnect circuit with LCD and data logger to meet both of those requirements.

low voltage disconnect with LCD and data logger

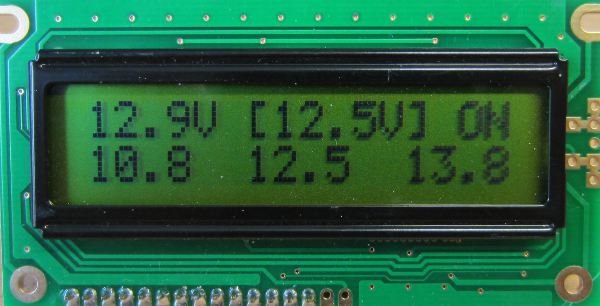
We have attempted to make this device as useful as possible while being as simple as possible to use. The LCD pictured above from our prototype shows (from top left to top right) the current voltage measurement (updated every 0.1 seconds), the target voltage for change of state (in this example 12.5V is the voltage below which the low voltage disconnect will engage), and the state (in this case, output ON).

The bottom row shows the data from the data logger, from left to right, minimum voltage logged, average (arithmetic mean) voltage logged, and maximum voltage logged.

The voltage measured is logged once every just over 7 minutes, with the most recent 200 measurements logged. That gives a 24 hour record of the battery voltage which is very useful for identifying problems and understanding battery usage.

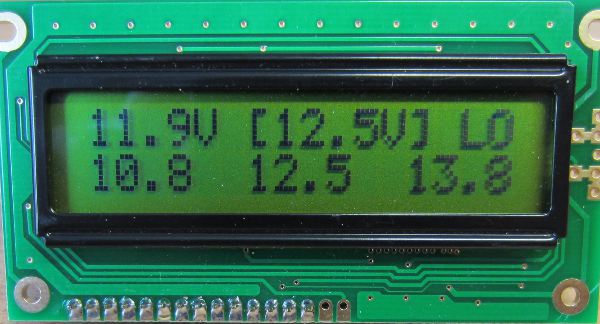
reuk LVD with LCD and data logger

In the screenshot above, the state is now ‘LO’ since the measured voltage (11.9V) is below the LVD voltage (12.5V). After 10 seconds of this state being maintained, the output would be turned off automatically and only turn back on after 10 seconds of the measured voltage exceeding the LVD cancellation voltage.

The user can easily set the disconnect voltage and cancellation voltage using the display and a button on the LVD circuit, and the datalog can also be cleared by the user. All data is retained by this LVD circuit even when it is disconnected from the battery.

If you are interested in purchasing a low voltage disconnect circuit with display and datalogger, email neil@reuk.co.uk with details of your exact requirements.

12V Regulator for RC Planes, Helicopters, and Cars with Cameras

With the price of high quality ruggedised mini video cameras and transmitting equipment falling rapidly, many people are now attaching FPV (first person view) cameras to their radio controlled planes, helicopters, and cars with very impressive results.

View from RC plane camera

One common problem though is interference. When radio transmitting equipment is powered by the same power source as motors, servos etc, interference (noise) can add lines and other unwanted effects to the transmitted images.

The camera and transmitter need a very stable fixed voltage – e.g. 12.0 Volts – as anything else will damage the sensitive electronics. Therefore a voltage regulator is required. For their high efficiency and small dimensions a switching type regulator would appear to be the obvious choice, but this type of regulator generates yet more interference. Therefore a lower efficiency linear regulator must be used.

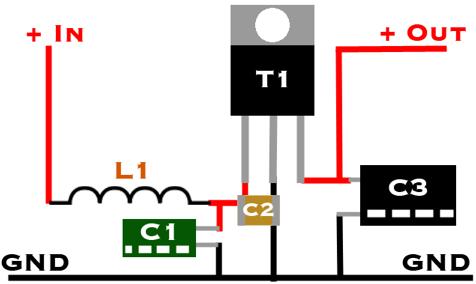
In the second half of this excellent article The Tricopter V2.6HV David Windestål from Sweden explains in detail how he built a very stable interference suppressing linear regulator around the LM2940 low dropout voltage regulator.

Very stable 12V linear regulator for RC

This is almost identical to our standard REUK 12V regulator but the components L1 (1mH coil) and C1 (low equivalent series resistance ESR also known as low impedance 22uF capacitor) have been added working together to make an LC filter (Wikipedia: electronic filter) to strip out any noise from the ESC (electronic speed controller) and everything else connected to the same battery pack.

Regulator for RC helicopter camera transmitter

With a 16.8V LiPo battery pack fitted in his DIY tricopter and a transmitter drawing 300mA, the regulator only has to get rid of 1.5W of heat, so only a small heatsink was required resulting in the finished regulator ended up small and light which transmits video which is “crystal clear [without] a hint of interference”.

Testing Car Battery Voltage Meter

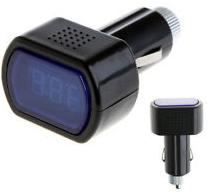
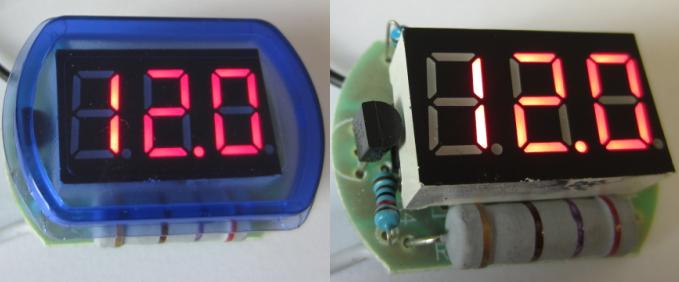
LED car battery voltmeterPictured above is a car battery voltage meter which is designed to be inserted into the cigarette lighter socket of a vehicle to test and display the battery voltage – purchased for £1.76 including delivery from Hong Kong.

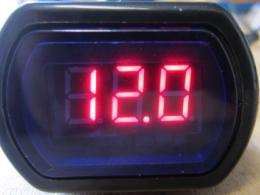
It is relatively well made if a bit plasticky, but certainly as good as should be expected for a device at this sort of price. Inserting it into the car cigarette lighter socket it displayed the battery voltage accurately to well within 0.1V, and when tested with a variable power supply gave similarly reliable readings with an input voltage from 6V to 16V.

LED voltmeter for 12V car battery

The LED numerical display is bright – if anything too bright as the voltmeter draws 40mA when it is on which is too high to leave connected to a battery all the time (taking 1Ah of charge from the battery per day).

We purchased this to test and to take apart for a project. Breaking it open was very easy.

taking apart an LED voltmeter

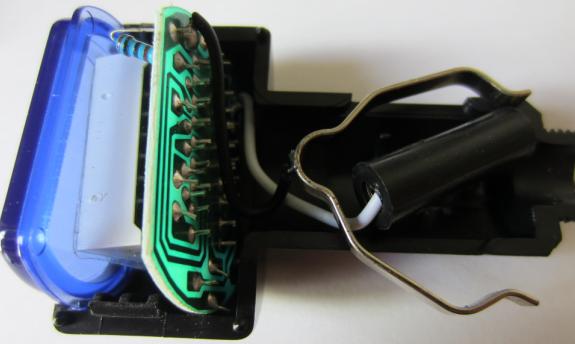
The plastic end cap is threaded onto the positive end of the cigarette lighter plug, and can be unscrewed (with a bit of force). Inside is a 5A fuse which should really be a 100mA fuse to properly protect the device.

Then the two sections of black plastic can then be prised apart to expose the innards.

Components inside the LED voltmeter

There is a small circuit board with an IC on it, the LED display, a large resistor, some other common components, and a TL431 adjustable precision zener shunt regulator which is used as the voltage reference.

We wanted this to stick on top of a solar charged 12V lead acid battery to display the battery voltage so we chopped off all the unnecessary bits and pieces leaving just the two wires for connection to the + and – terminals of the battery.

mini LED voltmeter for 12V batteryThe blue plastic cover is pretty much vital as without it it is very difficult to read the voltage from the display.

Finally, to reduce power consumption, we wired a small push to make button to the white positive input cable and connected that and the black negative cable to the terminals of the battery. Now, whenever the button is pressed and held, the battery voltage is displayed. This mini LED battery voltmeter is only 3.5 x 2.5 x 1.0 centimetres in size and does the job perfectly.

If you are interested in buying one of these car cigarette lighter LED voltmeters click here.

Testing LM2596 Variable Voltage Regulator

Our LM2596 Variable Voltage Regulator (discussed previously here: regulator with display) has finally arrived after its long journey from China.

LM2596 variable voltage regulator with display

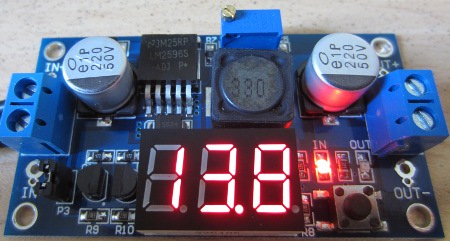
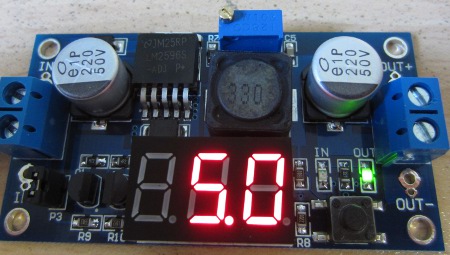
The first image above shows the input voltage as being 13.8V (which was accurate to <0.1V). The second image below shows the output voltage which we set by adjusting the small brass screw in the blue potentiometer to be 5.0V (which was also accurate to <0.1V).

lm2596 with LCD voltage display

The build quality and quality of the components used is excellent throughout, the LCD is bright, and the addition of a red LED and a green LED to indicate whether the input or output voltage is being displayed is very useful. Selecting whether to display input or output voltage is achieved using a small button on the regulator board. In addition to screw-in terminals for connection of the input and output wires, there are also holes with solder pads in both fine and medium sizes so that different sizes of wire can be more securely attached if required.

The only bad point would be that there is no option to turn off the LCD when it is not needed – i.e. it needs three options (display input voltage, display output voltage, or display nothing) instead of the two it has. The LCD draws approximately 25mA all the time, so will take 0.6Ah of charge out of a battery every 24hrs which is a lot. Another 10mA seems to be the quiescent current lost in the regulator when nothing is connected to the output but it is still regulating voltage.

We can think of many uses for these voltage regulators which are made easier thanks to the on board display – first and foremost for small battery charging from a 12V battery, and/or powering USB charged devices (using a 5.0V output). For battery charging of say four series connected NiMH rechargeables, you would just set the output voltage to say 5.8 or 5.9V and connect it to the battery pack with the correct polarity.

Apart from having slightly high self-power consumption, these regulators are excellent quality and fantastic value.

If you are interested in purchasing one of these regulators, click here: LM2596 Voltage Regulators. Prices are around £3.50 each or £17 for five including air mail delivery from China.

Project of the Day – 24V Low Voltage Disconnect

Pictured below is one of our standard programmable 12V low voltage disconnect (LVD) circuits which has been modified for 24V battery systems.

24V low voltage disconnect - LVD

The base circuit board used is one we designed and have made for us which is a multi-use board with a high quality matching enclosure. By soldering a few jumper links on the back of the board we can change its functionality, inputs, and outputs so that it meets the requirements of whatever project we are working on. We designed the board with a small prototyping area in the middle to which additional components can be added if required.

In order to use this board for a 24 Volt low voltage disconnect things were a little tricky as all on board components are designed for 12 Volts. Therefore we first added an LM317T voltage regulator (using R1=330R, R2=2K8 resistor) and screw in terminals for the 24V battery to be connected to. The 11.8V outputted from the regulator was then connected on the underside of the board to the usual 12V input terminals which are now not used.

We then added a voltage divider to reduce the approx 24V input voltage sufficiently so that it can be measured using the analog to digital converter (ADC) on the PICAXE-08M2 microcontroller – we needed less than 5V across the full range of input voltages from the 24V system (e.g. up to at least 30V), and wanted to set this up so that the digital value given when 24.00V is connected to this new LVD is the same as that given when 12.00V is connected to the standard LVD.

The ADC converts the voltage it is seeing into a 10-bit digital value from 0-1023 where 0 will be the value if the voltage is zero, and 1023 will be the value if the voltage is equal to the supply voltage of the microcontroller (5.00V in this case).

With the accurate 470K/100K voltage divider we use on the standard 12V LVD we get 35.922 per Volt – i.e. input 12.00V to the circuit, the voltage divider will reduce this before it gets to the ADC (to 2.553V) and the ADC will output 12.00*35.922 = 431. We have hard-coded the 35.922 multiplication factor into our 12V LVD and everything else is worked out from it.

We hand-calibrated the new voltage divider (because the resistors we used in it only have a 10% tolerance). We simply inputted a 24.00V voltage and measured the voltage seen on the ADC pin with an accurate multimeter. DIviding this voltage by 5.00V and multiplying by 1023 to get the ADC value we got 398, less than the 431 it would have been if the resistors were high tolerance. Dividing 398 by 12V we found that the multiplication factor for our 24V LVD was 33.135 per Volt, so we simply changed that one value in the microcontroller code and everything worked perfectly – the only difference is that the user can set the cut in and cut out voltages in 0.2V steps now instead of 0.1V steps.