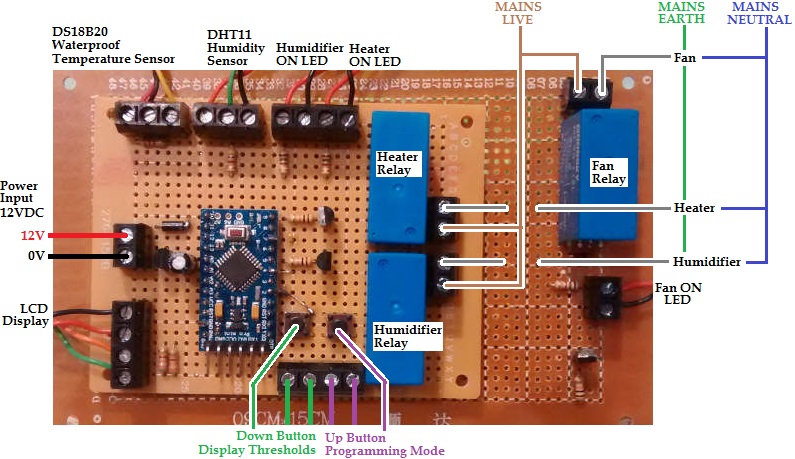
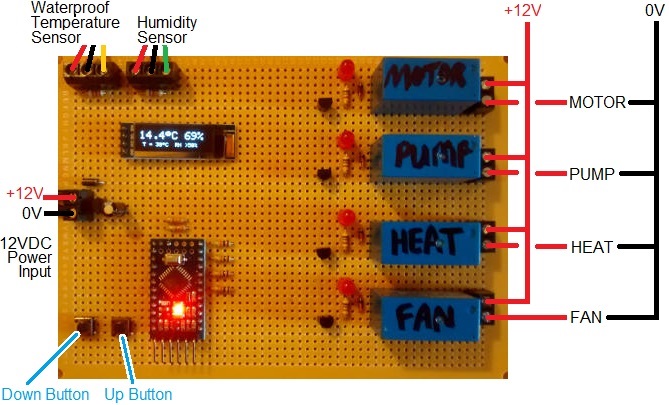
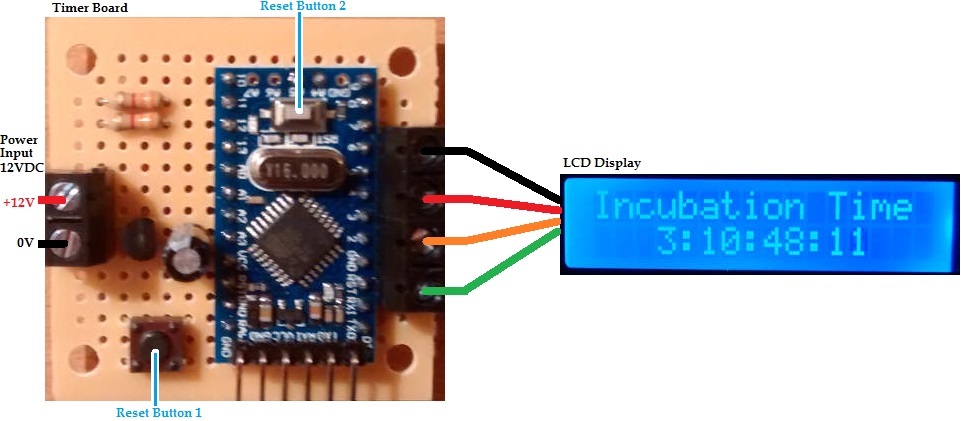
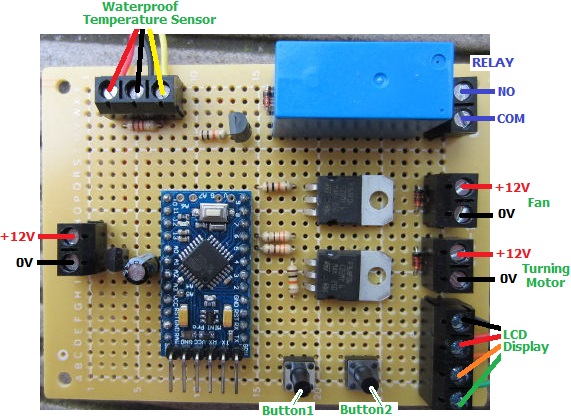
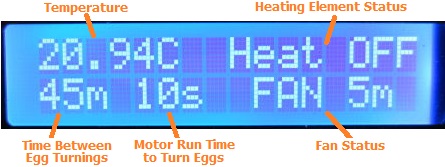
We are frequently asked for the source code used on the Arduino-based products which we design and build. Unfortunately we cannot do that for commercial reasons. However, more than 80 percent of the requests we receive are for the code used in our poultry egg incubation controllers, with almost 100 percent of those requests coming from the developing world.
Therefore, as a one-off, we are releasing the full Arduino source code for our most popular (and easiest to build with commonly available components) device of this type, our Poultry Egg Incubator with Humidity Sensor.
This device makes use of an always on motor which turns the eggs six full turns every 24 hours. Many of our other incubators have motors which have to be set up to run for a certain length of time a certain number of times per day, but the code for these is either specific to a particular motor or far more complicated (but of course more flexible) if the end-user of the incubator is to set these timings.
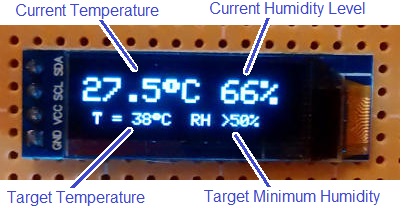
This device makes use of a DS18b20 digital temperature sensor, a 1602 LCD display module, a DHT11 humidity sensor, and is based around an Arduino Pro Mini, together with some relays, resistors, buttons, terminals, and other components available everywhere – easily salvaged from old and broken electronics even.
In time we will add a circuit diagram together with a suggested parts list, but the design is very flexible in terms of the components which can be used to put it together (with exception of the sensors and display for which the code provided is specific…and which together with an Arduino Pro Mini clone can be purchased for well under US$10 total including delivery.
Click here for details on how to connect and use a DHT11 Humidity Sensor with Arduino, and here for information on using DS18B20 sensors and 1602 LCD modules with Arduino.
Here is the full Arduino sketch (source code) for the egg incubator.
// (C) 2017-2020 REUK.CO.UK - Free for non-commercial use.
// Egg incubation temperature and humidity controller with display.
// Connection to an always on motor - e.g. 6 rotations per day.
// Fan for cooling, heater for heating, humidifier to humidify.

// For the temperature sensor.
#include <OneWire.h>
#include <DallasTemperature.h>
#define ONE_WIRE_BUS 3

// For the non-volatile storage.
#include <EEPROM.h> //EEPROM.write(addr, val); val = EEPROM.read(address);

// For the DHT11 humidity sensor.
#include <dht.h>
dht DHT;
#define DHT11_PIN 10

//for the LCD
#include <Wire.h>
#include <LCD.h>
#include <LiquidCrystal_I2C.h>
#define I2C_ADDR 0x27 // This i2c address depends on the display.
#define BACKLIGHT_PIN 3
#define En_pin 2
#define Rw_pin 1
#define Rs_pin 0
#define D4_pin 4
#define D5_pin 5
#define D6_pin 6
#define D7_pin 7
LiquidCrystal_I2C lcd(I2C_ADDR,En_pin,Rw_pin,Rs_pin,D4_pin,D5_pin,D6_pin,D7_pin);

// Setup a oneWire instance to communicate with the OneWire
// device (Dallas temperature IC)
OneWire oneWire(ONE_WIRE_BUS);

// Pass our oneWire reference to Dallas Temperature.
DallasTemperature sensor1(&oneWire);

// Set up the input and output pins used on the Arduino.
const int button1 = 2;
const int button2 = 8;
const int heater = 9;
const int fan = 4;
const int humidifier = 5;

// Define variables to store the humidity and
// temperature readings froms sensors.
float sensorOneTemperature;
float humidity;

// Define variables for the upper and lower
// thresholds (read in from EEPROM).
float heaterOnThreshold;
float heaterOffThreshold;
float fanOnThreshold;
float fanOffThreshold;
float humidifierOnThreshold;
float humidifierOffThreshold;

// Define the memory locations of the thresholds in EEPROM.
int heaterOnEEPROM = 100;
int heaterOffEEPROM = 120;
int fanOnEEPROM = 140;
int fanOffEEPROM = 160;
int humidifierOnEEPROM = 180;
int humidifierOffEEPROM = 200;

// Set some default values for the thresholds.
const float heaterOnDefault = 37.0;
const float heaterOffDefault = 39.0;
const float fanOnDefault = 40.0;
const float fanOffDefault = 37.0;
const float humidifierOnDefault = 45.0;
const float humidifierOffDefault = 70.0;

// Define variables to keep track of the status of
// the system (0=off,1=on)
int heaterStatus;
int fanStatus;
int humidifierStatus;

void setup(void)
{
 // Start up the temperature sensor library.
 sensor1.begin();
 // Set the temperature measurement resolution to
 // 12 bit ADC (0.0625°C resolution)
 sensor1.setResolution(12);

 // Read in the threshold values from EEPROM.
 heaterOnThreshold = EEPROM_readFloat(heaterOnEEPROM);
 heaterOffThreshold = EEPROM_readFloat(heaterOffEEPROM);
 fanOnThreshold = EEPROM_readFloat(fanOnEEPROM);
 fanOffThreshold = EEPROM_readFloat(fanOffEEPROM);
 humidifierOnThreshold = EEPROM_readFloat(humidifierOnEEPROM);
 humidifierOffThreshold = EEPROM_readFloat(humidifierOffEEPROM);

 // Make sure that we at least have read in values, or read in defaults.
 if(isnan(heaterOnThreshold)) heaterOnThreshold = heaterOnDefault;
 if(isnan(heaterOffThreshold)) heaterOffThreshold = heaterOffDefault;
 if(isnan(fanOnThreshold)) fanOnThreshold = fanOnDefault;
 if(isnan(fanOffThreshold)) fanOffThreshold = fanOffDefault;
 if(isnan(humidifierOnThreshold)) humidifierOnThreshold = humidifierOnDefault;
 if(isnan(humidifierOffThreshold)) humidifierOffThreshold = humidifierOffDefault;

 // Set up the inputs and outputs on the Arduino IO
 pinMode(button1, INPUT);
 digitalWrite(button1, HIGH); //turn on the pull up resistor
 pinMode(button2, INPUT);
 digitalWrite(button2, HIGH); //turn on the pull up resistor
 pinMode(heater, OUTPUT);
 digitalWrite(heater, LOW);
 pinMode(fan, OUTPUT);
 digitalWrite(fan, LOW);
 pinMode(humidifier, OUTPUT);
 digitalWrite(humidifier, LOW);

 // Need to keep track of the status of the heater, fan, and humidifier
 // so we know whether they are on or off.
 heaterStatus = 0; // Start with the heating element off (=0)
 fanStatus = 0; // Start with the fan off
 humidifierStatus = 0; // Start with humidifier turned off

 // Set up the LCD
 lcd.begin (16,2);
 // Switch on the backlight.
 lcd.setBacklightPin(BACKLIGHT_PIN,POSITIVE);
 lcd.setBacklight(HIGH);
 // Clear the display.
 lcd.clear();
 delay(200);
}

void loop(void)
{
 // Read in the temperature and humidity and display across
 // the top line of the display.
 readInAndDisplayTemperature();
 readInAndDisplayHumidity();
 // Display the current system status on the bottom line of the display.
 displaySystemStatus();

 // If heater is currently off, and temperature is low, turn on the heater.
 if(heaterStatus == 0 and sensorOneTemperature < heaterOnThreshold){
 digitalWrite(heater, HIGH);
 heaterStatus = 1;
 }

 // If heater is currently on, and temperature is high, turn off the heater.
 if(heaterStatus == 1 and sensorOneTemperature > heaterOffThreshold){
 digitalWrite(heater, LOW);
 heaterStatus = 0;
 }

 // If fan is currently off, and temperature is high, turn on the fan.
 if(fanStatus == 0 and sensorOneTemperature > fanOnThreshold){
 digitalWrite(fan, HIGH);
 fanStatus = 1;
 }

 // If fan is currently on, and temperature is low, turn off the fan.
 if(fanStatus == 1 and sensorOneTemperature < fanOffThreshold){
 digitalWrite(fan, LOW);
 fanStatus = 0;
 }

 // If humidifier is currently off, and humidity is low, turn on the humidifier.
 if(humidifierStatus == 0 and humidity < humidifierOnThreshold){
 digitalWrite(humidifier, HIGH);
 humidifierStatus = 1;
 }

 // If humidifier is currently on, and humidity is high, turn off the humidifier.
 if(humidifierStatus == 1 and humidity > humidifierOffThreshold){
 digitalWrite(humidifier, LOW);
 humidifierStatus = 0;
 }

 // Press and hold button1 for half a second to briefly show
 // the thresholds currently set.
 if(digitalRead(button1)==LOW){
 int i;
 for(i = 0; i < 5; i++){
 delay(100);
 if(digitalRead(button1) == HIGH) i = 20;
 }
 // If button was held for at least 1/2 second, display thresholds...
 if(i < 11){
 displayThresholds();
 }
 }

 // Press and hold button2 for half a second to enter programming mode.
 if(digitalRead(button2)==LOW){
 int i;
 for(i = 0; i < 5; i++){
 delay(100);
 if(digitalRead(button2) == HIGH) i = 20;
 }
 // If button was held for at least 1/2 second we go into programming mode.
 if(i < 11){
 programmingMode();
 }
 }
}

void programmingMode(){
 // We arrive in here with the button2 currently being pressed
 // and entering programming mode.
 lcd.clear();
 lcd.setCursor(0,0);
 // Make sure that the user has released the programming button
 while (digitalRead(button1) == LOW) {
 delay(100);
 }
 lcd.print("PROGRAMMING MODE");

 // Wait for button2 to be released.
 do{
 delay(50);
 }while(digitalRead(button2) == LOW);

 // FIRST of all we are going to programme in the new value
 // for heaterOnThreshold
 lcd.setCursor(0,0);
 lcd.print("set Heater ON T ");
 displayANumberDuringProgramming(heaterOnThreshold);
 for(int i = 0; i < 50; i++){
 delay(100);
 if(digitalRead(button1) == LOW){ // go down
 heaterOnThreshold = heaterOnThreshold - 0.2;
 displayANumberDuringProgramming(heaterOnThreshold);
 i = 0;
 waitForButton1Release();
 }
 if(digitalRead(button2) == LOW){ // go up
 heaterOnThreshold = heaterOnThreshold + 0.2;
 displayANumberDuringProgramming(heaterOnThreshold);
 i = 0;
 waitForButton2Release();
 }
 }
 EEPROM_writeFloat(heaterOnEEPROM, heaterOnThreshold);

 // SECOND we set the new value for heaterOffThreshold.
 lcd.setCursor(0,0);
 lcd.print("set Heater OFF T ");
 displayANumberDuringProgramming(heaterOffThreshold);
 for(int i = 0; i < 50; i++){
 delay(100);
 if(digitalRead(button1) == LOW){ // go down
 heaterOffThreshold = heaterOffThreshold - 0.2;
 displayANumberDuringProgramming(heaterOffThreshold);
 i = 0;
 waitForButton1Release();
 }
 if(digitalRead(button2) == LOW){ // go up
 heaterOffThreshold = heaterOffThreshold + 0.2;
 displayANumberDuringProgramming(heaterOffThreshold);
 i = 0;
 waitForButton2Release();
 }
 }
 EEPROM_writeFloat(heaterOffEEPROM, heaterOffThreshold);

 // THIRD we are going to programme in the new value
 // for fanOnThreshold.
 lcd.setCursor(0,0);
 lcd.print("set fan ON T ");
 displayANumberDuringProgramming(fanOnThreshold);
 for(int i = 0; i < 50; i++){
 delay(100);
 if(digitalRead(button1) == LOW){ // go down
 fanOnThreshold = fanOnThreshold - 0.2;
 displayANumberDuringProgramming(fanOnThreshold);
 i = 0;
 waitForButton1Release();
 }
 if(digitalRead(button2) == LOW){ // go up
 fanOnThreshold = fanOnThreshold + 0.2;
 displayANumberDuringProgramming(fanOnThreshold);
 i = 0;
 waitForButton2Release();
 }
 }
 EEPROM_writeFloat(fanOnEEPROM, fanOnThreshold);

 // FOURTH we are going to programme in the new value
 // for fanOnThreshold.
 lcd.setCursor(0,0);
 lcd.print("set fan OFF T ");
 displayANumberDuringProgramming(fanOffThreshold);
 for(int i = 0; i < 50; i++){
 delay(100);
 if(digitalRead(button1) == LOW){ // go down
 fanOffThreshold = fanOffThreshold - 0.2;
 displayANumberDuringProgramming(fanOffThreshold);
 i = 0;
 waitForButton1Release();
 }
 if(digitalRead(button2) == LOW){ // go up
 fanOffThreshold = fanOffThreshold + 0.2;
 displayANumberDuringProgramming(fanOffThreshold);
 i = 0;
 waitForButton2Release();
 }
 }
 EEPROM_writeFloat(fanOffEEPROM, fanOffThreshold);

 // FIFTH we are going to programme in the new value
 // for humidifierOnThreshold
 lcd.setCursor(0,0);
 lcd.print("set Humidi ON % ");
 displayANumberDuringProgramming(humidifierOnThreshold);
 for(int i = 0; i < 50; i++){
 delay(100);
 if(digitalRead(button1) == LOW){ // go down
 humidifierOnThreshold = humidifierOnThreshold - 2;
 displayANumberDuringProgramming(humidifierOnThreshold);
 i = 0;
 waitForButton1Release();
 }
 if(digitalRead(button2) == LOW){ // go up
 humidifierOnThreshold = humidifierOnThreshold + 2;
 displayANumberDuringProgramming(humidifierOnThreshold);
 i = 0;
 waitForButton2Release();
 }
 }
 EEPROM_writeFloat(humidifierOnEEPROM, humidifierOnThreshold);

 // SIXTH we are going to programme in the new value
 // for humidifierOffThreshold
 lcd.setCursor(0,0);
 lcd.print("set Humidi OFF % ");
 displayANumberDuringProgramming(humidifierOffThreshold);
 for(int i = 0; i < 50; i++){
 delay(100);
 if(digitalRead(button1) == LOW){ // go down
 humidifierOffThreshold = humidifierOffThreshold - 2;
 displayANumberDuringProgramming(humidifierOffThreshold);
 i = 0;
 waitForButton1Release();
 }
 if(digitalRead(button2) == LOW){ // go up
 humidifierOffThreshold = humidifierOffThreshold + 2;
 displayANumberDuringProgramming(humidifierOffThreshold);
 i = 0;
 waitForButton2Release();
 }
 }
 EEPROM_writeFloat(humidifierOffEEPROM, humidifierOffThreshold);
}

void waitForButton1Release(){
 do{
 delay(50);
 }while(digitalRead(button1) == LOW);
}

void waitForButton2Release(){
 do{
 delay(50);
 }while(digitalRead(button2) == LOW);
}

void displayANumberDuringProgramming(float theNumber){
 lcd.setCursor(0,1);
 lcd.print(" ");
 lcd.print(theNumber,1);
 lcd.print(" ");
}

void readInAndDisplayTemperature(){
 readTemperatureSensor();
 displayTemperature();
}
void readTemperatureSensor(){
 sensor1.requestTemperatures();
 sensorOneTemperature = sensor1.getTempCByIndex(0);
}
void displayTemperature(){
 // Need to deal with below zero temperatures and also
 // with above 100 degree temperatures. Adjust number of
 // decimal places to result in similar number of overall
 // digits used.
 int dp; //number of decimal places to show

 // Show the temperature on the screen
 lcd.setCursor(0,0);
 dp = 2; //by default
 if (sensorOneTemperature > 99.9) dp = 0;
 if (sensorOneTemperature < 0) dp = 0;
 lcd.print("T=");
 lcd.print(sensorOneTemperature,dp);
 lcd.print((char)223);
 lcd.print("C");
 lcd.print(" ");
}

void readInAndDisplayHumidity(){
 readInHumidity();
 displayHumidity();
}

void readInHumidity(){
 // Read in the humidity from the sensor and set it
 // to the global variable 'humidity'.
 int chk = DHT.read11(DHT11_PIN);
 humidity = DHT.humidity;
}

void displayHumidity(){
 // Note - always call this function immediately
 // after displaying the temperature.
 lcd.print("H=");
 lcd.print(humidity,0);
 lcd.print("% ");
}

void displaySystemStatus(){
 lcd.setCursor(0,1);
 // We need to display the status of the heater, fan,
 // and humidifier which can be ON or OFF. If status is
 // ON, fill in character in front of device name.
 if(heaterStatus == 1)
 lcd.write(255);
 else lcd.print(" ");
 lcd.print("Heat ");
 if(fanStatus == 1)
 lcd.write(255);
 else lcd.print(" ");
 lcd.print("Fan ");
 if(humidifierStatus == 1)
 lcd.write(255);
 else lcd.print(" ");
 lcd.print("Hum ");
}

void displayThresholds(){
 // Arrive here with button1 currently depressed.
 // Show the six programmed thresholds on the screen
 // for three seconds each.

 // First of all show the heater thresholds.
 lcd.clear();
 lcd.print("Heater ");
 lcd.setCursor(0,1);
 lcd.print(heaterOnThreshold,1);
 lcd.print((char)223);
 lcd.print("C to ");
 lcd.print(heaterOffThreshold,1);
 lcd.print((char)223);
 lcd.print("C ");
 delay(3000);

 // Now show the fan thresholds.
 lcd.setCursor(0,0);
 lcd.print("Fan ");
 lcd.setCursor(0,1);
 lcd.print(fanOnThreshold,1);
 lcd.print((char)223);
 lcd.print("C to ");
 lcd.print(fanOffThreshold,1);
 lcd.print((char)223);
 lcd.print("C ");
 delay(3000);

 // Now show the humidifier thresholds.
 lcd.setCursor(0,0);
 lcd.print("Humidifier ");
 lcd.setCursor(0,1);
 lcd.print(humidifierOnThreshold,0);
 lcd.print("% to ");
 lcd.print(humidifierOffThreshold,0);
 lcd.print("% ");
 delay(3000);
}

//---------------------------------------------------------
// Utility functions to write float values to EEPROM and to
// read them back in again.
void EEPROM_writeFloat(int ee, float value)
{
 byte* p = (byte*)(void*)&value;
 for (int i = 0; i < sizeof(value); i++)
 EEPROM.write(ee++, *p++);
}

float EEPROM_readFloat(int ee)
{
 float value = 0;
 byte* p = (byte*)(void*)&value;
 for (int i = 0; i < sizeof(value); i++)
 *p++ = EEPROM.read(ee++);
 return value;
}
