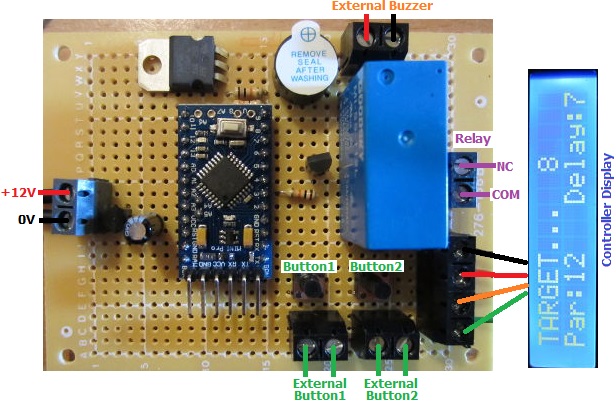
Pictured above is a target shooting timer relay controller with programmable options for different shooting programmes. With this device the user can set the number of seconds that the target is to remain edge-on to the shooter and how many second that it is to remain face-on to the shooter, and also how many cycles of edge and face the shoot will comprise.
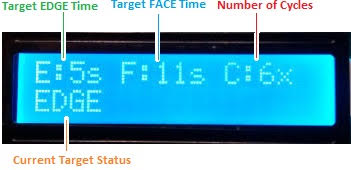
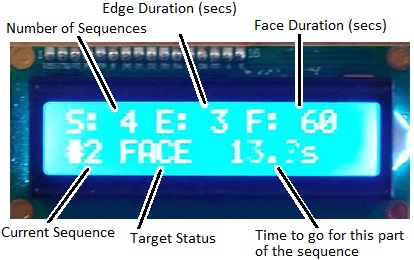
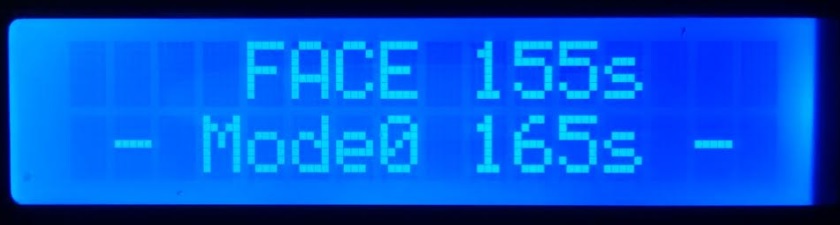
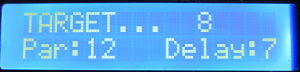
The backlit display with this device shows the user programmed number of seconds that the target will edge (E) then face (F), and the number of cycles (C) for which it will be repeated. It also shows the current status of the target.
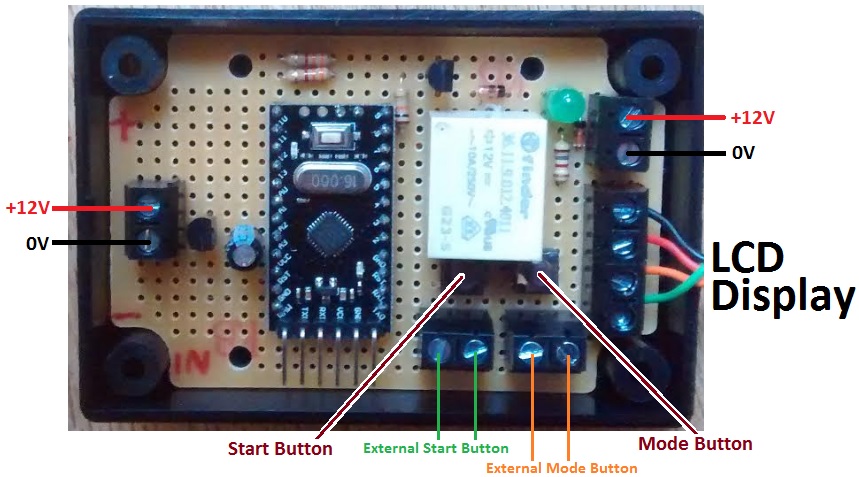
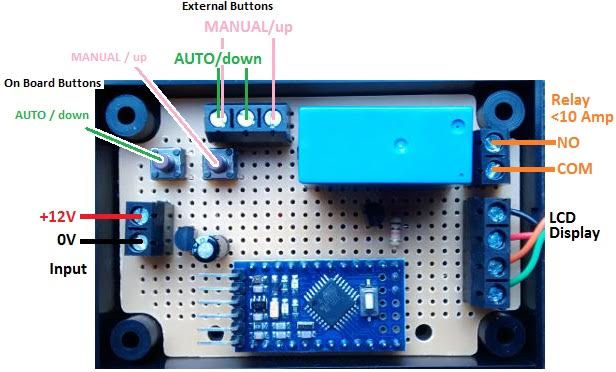
There are two buttons on the controller. The MANUAL button is used to enter the programming mode to set the timings for the programme and also to toggle the target manually between facing and edging. The AUTO button is used to start the programme. The programme starts by edging the target, and finishes also with the target edged.
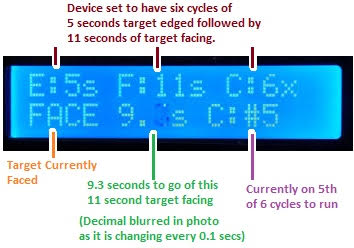
While the shooting programme is running, the display continues to show the user set programme values and the status of the target. It also shows a running countdown of the time remaining during this part of the cycle, and also which cycle the shooter is currently on.
If you need any kind of automated user-programmable timer for target shooting, please email neil@reuk.co.uk with details of your requirements.
Shooting Timer Instructions
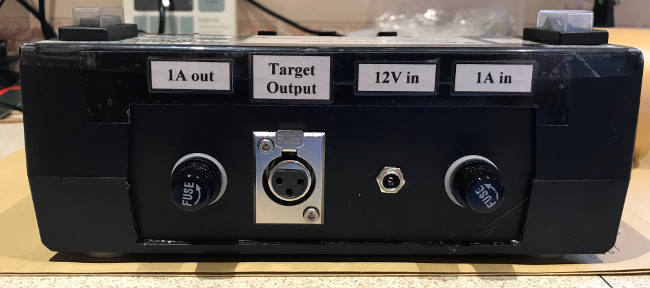
Connect up the timer as shown in the connection diagram at the top of page making sure to use correct polarity for the 12VDC power input. The controller has buttons on board, but external push to make buttons can be connected in parallel to those as shown in the connection diagram.
Programming
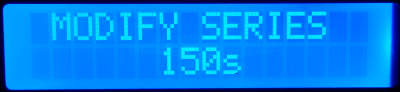
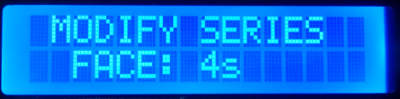
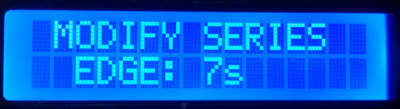
To set the timings for your controller, press and hold the UP button for a couple of seconds until the display shows PROGRAMMING MODE. When you release the button, you will be prompted to ‘SET Edge time’. You can use the UP and DOWN buttons to change the displayed value within the range 1-99 seconds. Five seconds after you last pressed a button, whatever is displayed for Edge is saved in memory, and you will be prompted to ‘SET Face time’. Again the UP and DOWN buttons are used to change the displayed value within the range 1-999 seconds. (Since the face time can be set to a high value, if you press and hold the UP or DOWN button, you will be able to speedily increase or decrease the value.) Finally you will be prompted to ‘SET Cycles’. This can be set within the range 1-9 repeating cycles of the Edge/Face times.
The values you set in programming mode are saved in long term memory and are therefore retained if/when you disconnect and subsequently reconnect the power to the controller. You only need to repeat the above described steps if you want to change one or more of the saved values.
Using the Timer
In normal operation with your timings already programmed, the Manual/UP button can be used to manually toggle the position of the target. If the target is face on, press the button, and it will edge. Press the button again, and the target will be face on again.
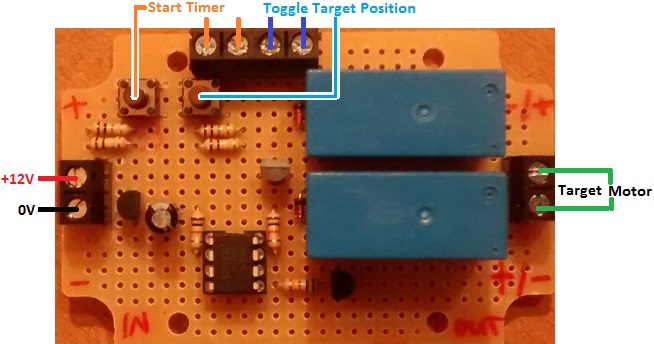
The relay on the controller is closed when the target is edge on, and open when the target is face on. Therefore, when no power is being supplied to the target, it is expected that your target will be configured to be face on.
To run the timer, press the Auto/DOWN button. All cycles start with the target edge on, so if you have manually set the target to be face on, it will turn to edge on. As shown above, the display will show where you are in the programme, the countdown timer, the target status (edge or face), and which cycle you are currently on.
If you want to stop the timer when it is running, press the Auto/DOWN button again. The target will turn to be edge on if it is not already.
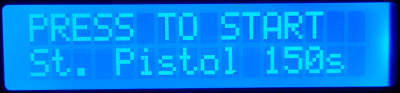
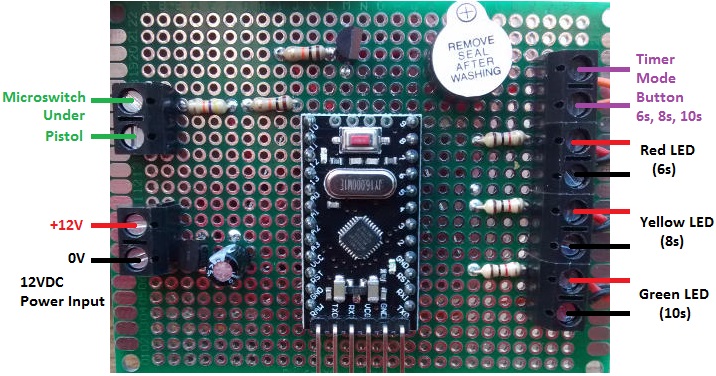
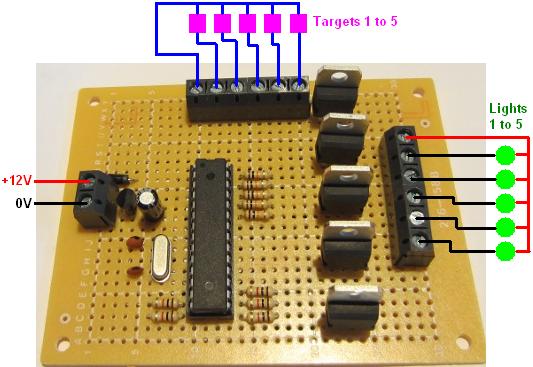
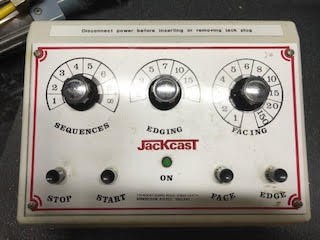 Pictured above is an old Jackcast shooting target timer controller which needed replacing. This timer could be set to repeat sequences 1-8 times or forever, the target edge times to 1, 2, 3, 5, 7, 10, 15, or 30 seconds, and the target face times to 1, 2, 3,4, 5, 6, 8, 10, 15, 20, and 150 seconds. Buttons are provided to manually face or edge the target, and there are start and stop buttons to run and stop the timer.
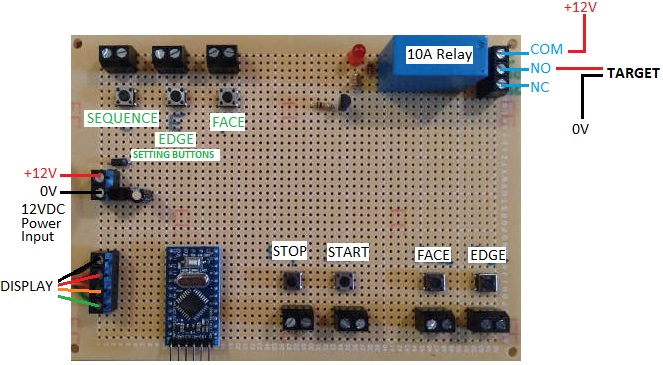 This will be fitted into an enclosure with panel mounted buttons, and the display as shown below mounted to show system settings and the timer status.