It is often very useful to be able to quickly copy files from a Windows PC to a Raspberry Pi, or to copy files from a Raspberry Pi to a Windows PC. There are many ways to achieve this, but one of the quickest and easiest is to use SCP (secure copy).
Copying a File from Windows to Raspberry Pi
First of all we will copy a file testFile.txt from the Windows desktop to a USB memory stick mounted to a Raspberry Pi. (Click here for our article on USB memory stick mounting for Raspberry Pi.)
If you do not have SSH enabled on your Raspberry Pi, here is a guide to enabling SSH.
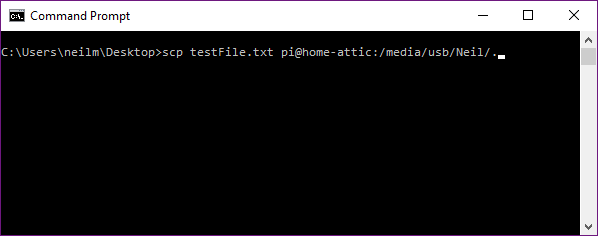
Open a command prompt on the Windows PC (Win-R, then enter cmd and press Enter). Enter the command as shown below changing the details to meet your own requirements.
Here, pi is your username on the Raspberry Pi. home-attic is the host name of the Raspberry Pi (click here to find out how to change the name of your Raspberry Pi). /media/usb/Neil is the directory the file is to be copied into. The ‘.’ at the end of the command just means that we will use the original file name for the copied file.
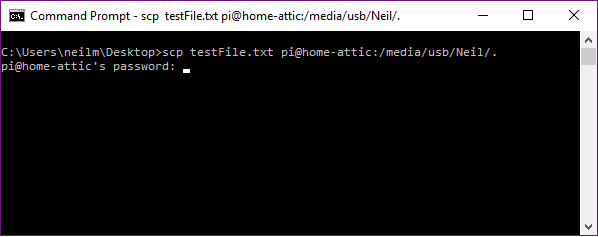
You will now be prompted to enter the password for your account on the Raspberry Pi.
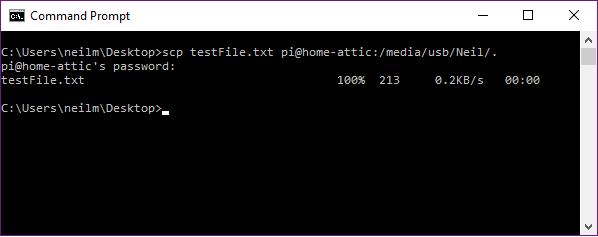
…and then the file will be copied across from the Windows PC to the Raspberry Pi.
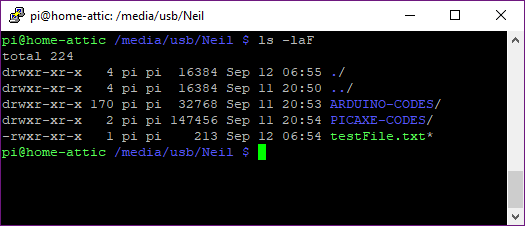
SSHing into the Raspberry Pi, and navigating to the destination folder, we can see that the file has been successfully copied.
Copying a File from Raspberry Pi to Windows
Copying a file from a Raspberry Pi to a Windows PC is a very similar process, but first of all, your Windows PC must be running an SSH server. All the information you need to set that up is available here: Installing an SSH Server on Windows using OpenSSH. It only takes a minute.
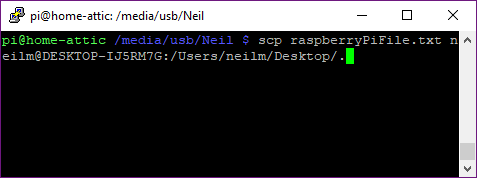
Open a terminal window on your Raspberry Pi, or SSH into it from your PC. Then enter the command below where raspberryPiFile.txt is the file to be copied, neilm is the username for the account on the Windows PC, DESKTOP-IJ5RM7G is the name of the PC, and /Users/neilm/Desktop/ is the folder that that file is to be copied into. Again, the ‘.’ just means that the copied file will retain its file name.
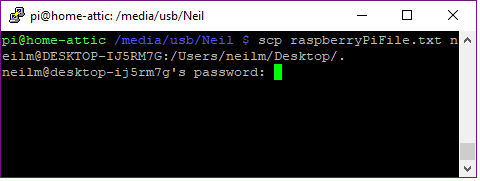
You will then be prompted for a password. This is the Windows account password for the user who will receive the copied file.
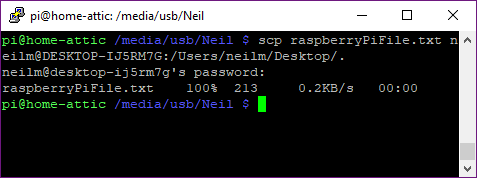
…and then the file will copy across.
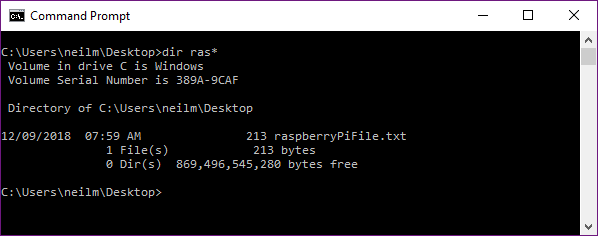
In this example, the file will arrive on the desktop of the user neilm and be immediately visible. It can also be found with file explorer, or with the Windows command prompt as shown below.
Automatically Send Raspberry Pi Photographs to a Windows PC Desktop
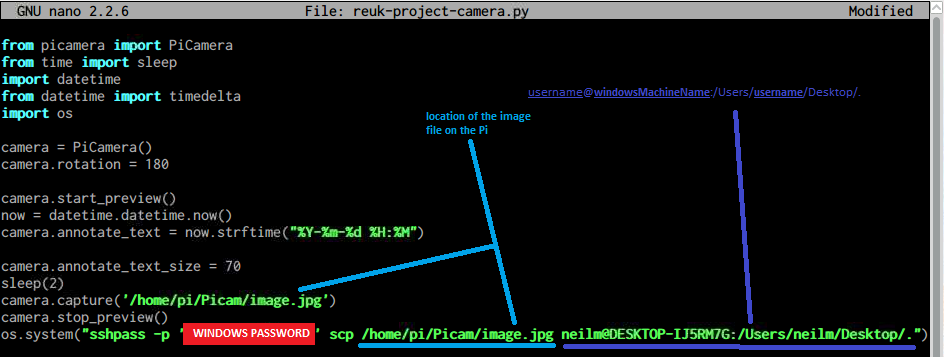
The Python script below shows how to get the Raspberry Pi camera to take a photograph, and then automatically copy the generated image to a Windows PC on the same network using sshpass to supply the password for the Windows PC user who will receive the image file.
More Information on Using SCP
SCP can be used to copy whole directories/folders and/or selected files and directories/folders. Here is a basic guide to using SCP for file transfers.
If you want to use your Raspberry Pi as backup storage for your Windows PC (or visa versa), using rsync over SSH is a great way to automate the process.
Viewing Images from a Remote PC over the Internet
If you do not want / are unable / are not allowed to change your broadband router port forwarding settings and want to view the images taken by your Raspberry Pi over the internet from any device and location, things can get quite complicated.
One way around this is to install the Google Chrome Remote Desktop app to your PC, and then use the Remote Desktop client in the Chrome browser on any other internet connected device. This will give you full secure access to your PC desktop from anywhere in the world with no port forwarding required. You can therefore see and manipulate the image files dropped onto your desktop by the Raspberry Pi (and also ssh into your Raspberry Pi via a Chrome app or using Putty or similar from your PC desktop remotely giving you full control.)
